Showing posts with label Completed Projects. Show all posts

Wednesday, August 31, 2011

Pearl of the Orient, My Challenge Entry

THE CHALLENGE

The Philippine Polymer Clay Guild just completed another challenge for the month of August...The Pinoy Challenge. We were suppose to choose materials that is indigenous to the Philippines and incorporate it into polymer clay. I wasn't planning to join the challenge this month. However, when everyone began to post their projects, a little rumbling inside me started. It swirled around in my head until one morning it turned into a thought...an inspiration. That very same day, I took out my pen and paper and started on a design.

INSPIRATION
So, what is my inspiration for this piece? The Ocean...in particular, the bottom of the Philppine seas. I was reminiscing  about memories from a past summer when we went to Bohol. We went snorkeling there. The beautiful sandy floor and its rich flora of corals along with the myriads of marine life swirled around the bubbles of the ocean as we were pushed and pulled by the swaying of the waves. It was full of life and beauty..and that is a part of the Philippines that we can all be proud of.


MATERIALS
It took a few days to get my materials together. I wanted to used something beautiful and colorful. So, I decided to use Pearls and shells. The iridescence of the materials alone would be sure enough to make the project awesome! And to give it an extra kick, I decided on a "Jewel Tones" palette. I wanted the shells and pearls to be the main source of color of the piece. As for the clay, I selected the turquoise, blues and a touch of green...just as you would see in the ocean.

And for the canvas...i decided on a wooden picture frame. I wanted this piece to be something impressive, just as the ocean is. So, although I know it would take a lot more time and patience, I selected one of the larger sized frames that I thought would fit in my small sized oven.

So, I got to work and started on my project....

I was working on our dining room table and you can see a lot of coffee was being consumed..as well as "Chinese take out" (Chow King) since I had no time to make meals...haha... what a mess. My hubby and I were having a movie marathon so, I was watching while working...

PITFALLS
I was hoping my picture frame would fit nicely in the oven so that I could create my embellishments right on top of it. Unfortunately when I got home, I found that the frame was way too large. So, I had to figure out a way to work in pieces. I had to make four separate pieces baked separately, then assembled it together by using glue and finally gluing that on to the frame itself...

This is how to join looks for the separate pieces. They interlock and will be glued together once finished.

I also had to worry about securing all the beads that I had incorporated into the clay. There were so many that I really did not want to use glue on each and everyone. So I tried to somehow secure the pieces by making sure to put a piece of swirl on top of the bead and also by using liquid clay (as suggested by a fellow clay artist..Thanks Ghie!)

In the end, I went back over the beads and for those that weren't secure, I still had to go back and use E600 glue...just to be sure...


THE PROCESS
It took about 6 movies to finish the 4 pieces... that's about 12 hours. That doesn't include the baking time, of course. Then a bit more time to assemble the pieces. Here's the progression of the work...


And finally when I completed the last piece..I was jumping for joy! This was the biggest piece I ever attempted..and, happy to say, tackled!

DETAILS

I do plan to add a few more things to the finished piece... a few more oysters and more marine life. So far I added a few as you can see in the detail pictures...

Oyster detail

White fish detail

Orange fish detail

Hello little fishy...


Detail of the swirls

THE FINISHED ENTRY -
PHILIPPINES: THE PEARL OF THE ORIENT


For Size Reference...my puppy Charley wanted to be in the pictures too so here he is...


Thanks P3 (Philippine Polymer Clay Guild) for being a source of inspiration and pushing us to excel! I can't wait for the next challenge!

Monday, August 22, 2011

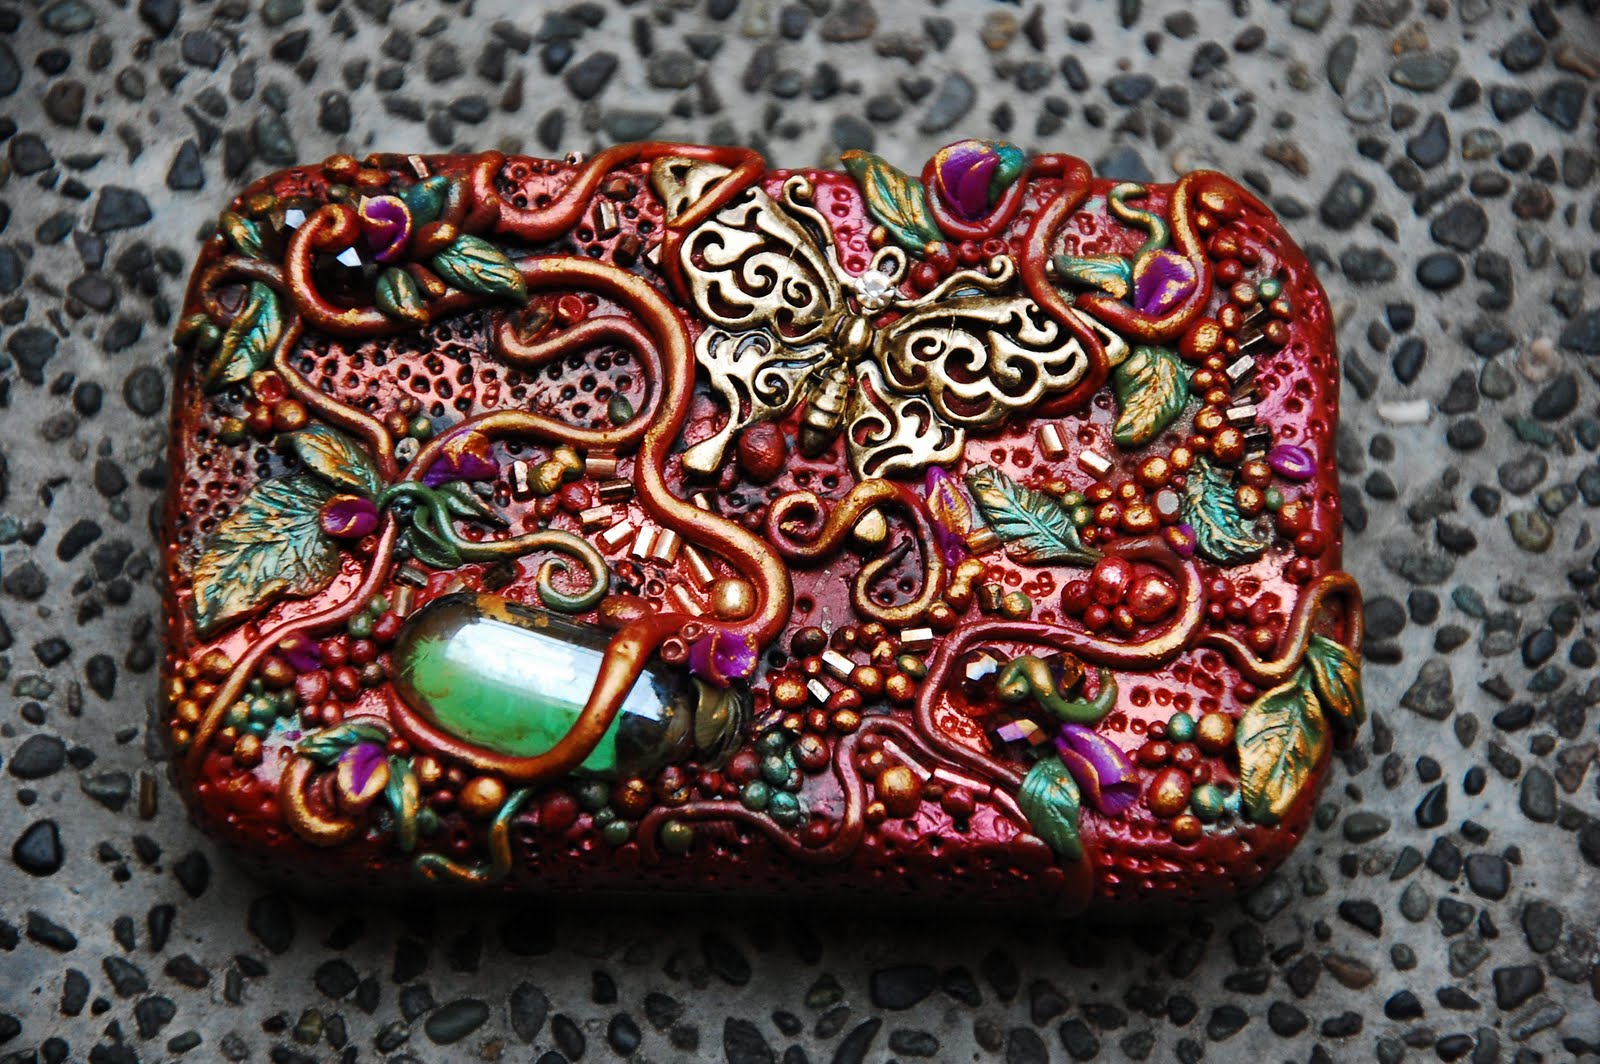
MAGIA NEL BOSCO (MAGIC IN THE FOREST)

This is my newest heirloom treasure tin, MAGIA NEL BOSCO which means MAGIC IN THE FOREST in Italian. It is a one of a kind piece inspired by Chris K of Mandarin Moon. I wanted to bestow upon it an aura and feel of walking in the forest, all the while, discovering magic all around.


You can find this magical tin listed in my etsy shop - here.

I'm planning to have many more of these Heirloom Treasure Tins in all sorts of shapes, sizes and designs. I am also open for specialized,, made to order tins for your own special keepsakes. Please contact me through my email (myearthlyjewels(at)yahoo(dot)com).

That's all for now...have a nice day!

Wednesday, August 3, 2011

Trash to Treasure Challenge...Winners

Congratulations to the winners of the Trash to Treasure Challenge held by Philippine Polymer Clay Guild....

First Place: Jennifer Cruz. Her entry was the Glass container Lamp whiched got 120 votes!!!


I'm not surprised at all...Jennifer is an incredible polymer clay artist. Just check out her wonderful work in any of these links:


or you can read more about her work in her blog....


Second place goes to Jhoi Montano...
Her entry is "Tin Can Bag" which acquired 115 votes.

You can see a lot of work went into this from each detailed tile. 
Find more of Jhoi's work in the link below-


Third Place goes to Melody Manalaysay.
Her entry is "Bottlecap Pendant" which acquired 85 votes.


How lovely would these precious pretties be hanging around your neck?
Find more of her work in the links below:


Congratulations on such beautiful work...I was proud to be part of such wonderful talent....here is the piece that I entered...
my Floral Candle Garden


Congratulations too goes to 3 lucky voters chosen randomly...
Krazelle E.
Louella M.
Hilary S.

Who will be receiving prizes made of polymer clay from our challenge sponsors.

I sure enjoyed this challenge and can't wait for this month's project!

That's all for now...have a great day!

Wednesday, May 25, 2011

BTW...Ocean Spray Pendant


Today I'm working on a pendant which I cal Ocean Spray made of clay. It is inspired by different artists like Christie Friesen and Chris Kapono... Here, I first drew out a general idea of what I want the pendant to look like. I chose a plain grey colored clay and added the turquoise stones. The swirls remind me of the ocean and the small circles are bubbles from the spray....

I start playing with the clay and have the general look here... 

Here's the finished piece without the color. I've added more detail with the little circles and antique spacer beads... I also added the brass  hook on top to hang the pendant from...I think it might be better to add that before starting to add the details of the pendant so as not to destroy any of the forms made on the pendant. 

A closeup with the initial drawing...it has taken a more involved form... 

I wanted to make some matching beads...maybe add as part of the necklace or maybe to make separate earrings for it...


Here's the completed piece....all in a day's work... You can't really see the color to well, but I finished it with Pearl-ex powder in a turquoise color. It gives it a wonderful shine. I'm still deciding if I should antique it with acrylic and maybe gloss? I'm liking it the way it is already... 

Thanks for joining me on this btw...you can check out what other btw-ers are working on by visiting the flickr group - here.

That's all for now...Have a good day!!!

Saturday, May 21, 2011

Glazing


These are some of the pendants from my btw...I fired them up in the oven yesterday and spent today  working on "glazing" them. I tried several ways of coloring the focals which includes using TLS with oil pastels as well as using Future Polish (actually the local version we have which is Pledge Wipe & Shine) and acrylic paint.

Here are my results....I like how they turned out. I was going for a faux ceramic look...and I think, I'm almost there.  I do need a high gloss finish, however. I'm wondering what to use. The Future polish finish here was just not glossy enough to get that ceramic look. I wonder what would be a better gloss. 

These beads will eventually go into my Etsy shop (Earthly Jewels Beads) once I have coated it with a high gloss.


This leaf pendant was glazed with oil pastel mixed in  with TLS . I'm thinking it needs a bit more color...but I am liking it. It matches the colors of the current ABS jewelry challenge. Hmmm...


This set is perfect for a pair of earrings or as a smaller sized pendant. It has a sort of steampunk style because of the impressions which were made from small screws.

This is a lovely heart pendant that I first "glazed" with a purple and then sprinkled with Pearlex. It gives it a slight antiqued look.


And a series of rectangular pendants...a floral with different colors and antiqued with acrylics.....

This one I really liked because its really looking a lot like ceramics...

and so is this...very cute colors...

Finally my blue pendant...I added a metal ring on top instead of putting a hole (to hang the pendant from)...I quite like the brass ring on top. It doesn't take away any part of the design on the bead. 


I liked every one of these and plan to do them in different colors. Still searching for a good gloss for it...either that or maybe I can cover it with resin on top....I'll have to give it a try too.

Which one did you like from above? Do you think they look like they could be ceramics? (faux ceramic) Thanks for stopping by!

Monday, May 16, 2011

Pendant Swap Complete

I was excited to get my last pendant for the swap today! They're so adorable! It was my first swap ever...both to host and to participate in. Here are the goodies that I received....


There were four of us participating. So, we only had to send out 3 pendants. I decided to send out 2 per person and another participant did the same.

The first pendant I received was this really cute mermaid. It is from Ms Rachelle of Queen Accessories. Here is a link to her online shop - http://queenaaccessories.multiply.com/


The second one I received was from Ms. Manalastas. She was kind enough to include two pendants. A flower with  swirls on the petals and a pendant locket.

And the third pendant (the one that arrived today) was from Ms. Fritzie of Chinky Charms - http://lhoche.multiply.com/ who sent an adorable flipflop pendant.


Finally, the ones that I sent out. I am really into hand painting my beads. I decided on a stamped pendant that reminds me of an ornate sun. I highlighted the raised parts with gold to brighten up the pendant. I also made a second pendant with a heart on it and attached it to a round bezel.

 Here's a picture of the work in progress....


I formed the same stamped pendants but made them in different colors....the finished pendants.... 


I added a decorated jump ring to the so they can be worn right away. I also included a black cord necklace. Here's a closeup of the combination of pendants sent to each person....


It was quite fun making these pendants....as well as receiving such cute ones too!  I hope to join and host more of these swaps. There is a group on facebook for Filipino clay artists which I just joined lately. I'm sure there will be great events there too! Can't wait.

Here's a photo Ms. Fritzie sent me of the pendants she received...

A big thank you to my swap partners! Hope you enjoyed and like the pendants that you received. Enjoy the summer!!!