I attended my first session in ceramics/stoneware yesterday and I couldn't be happier! It was a nice small class...three adults and 2 youngsters. Our teacher, Ms Katti Sta Ana is a very good instructor. She toured us around the ceramics studio and we jumped right in to working with the clay. I love the the feel of the stoneware clay. It definitely has a different consistency compared to the polymer clay I am used to working with.
First we learned to prepare our clay for working, a process called Wedging. We do this in order to knead the clay to get all the air bubbles out and get an even consistency.Then we wrapped the clay in plastic bags to keep them moist. We brought the clays to our table and started with our first technique/lesson...the pinch pot.
We started with a small ball of clay and pressed it in with our thumb. We continued to press the walls, feeling the thickness with our fingers while forming a little pot. We made several and combined the pots together until we formed a ball shape. Each of us was to make a pinch pot animal and since I love owls, it was my animal of choice. Our teacher made a puffer fish, my classmates made a cat, a turtle, a dog and a snowman. We also got to paint our finished creations with underglaze. Then we had to leave it to dry before it can be bisque fired.
We really learned a lot of things like how to make clay glue or also called slip, how to attach two pieces of clay together by scoring and adding glue, how to fix cracks on the surface and so much more. We each get to work with 2 kilos of clay every session and whatever we have left at the end of the session we can take home. I am excited to practice more today with the left over clay that I have...here are some pictures of our day's work...
This is my owl...the horns/ears looks a little funny and it makes him look like a devil...haha..
The two little girls in the class are quite inspiring to watch..they had so many ideas while working!!! Here are their pinch pot creations...a snowman and a dog...
All about crafting... Please check out my etsy shop: earthlyjewels.etsy.com and earthlyjewelsbeads.etsy.com
Wednesday, April 11, 2012
Monday, April 9, 2012
Working on Digital Collage Sheets
Happy Easter to you guys out there...I know I am a day late with my greeting. Its because here in the Philippines, Monday is still a holiday and I am still on holiday mode!!!
I have been busy working on my digital collage sheets. I've listed a few already so you can check them out in my etsy shop...
I have a cute tag, label or stick sheet that says handmade with love....
The default background color for the tag is hot pink but when you purchase the sheet, i can customize the background color to your liking..just make sure to message me or to write it in the note to seller.
I also have a Japanese Chiyogami type pattern collage sheet in circles great for bottlecaps and round bezels....they are available in 30mm, 20mm or 15mm sizes.
and here's what it would look like on a round ring bezel...pretty sweet!!!
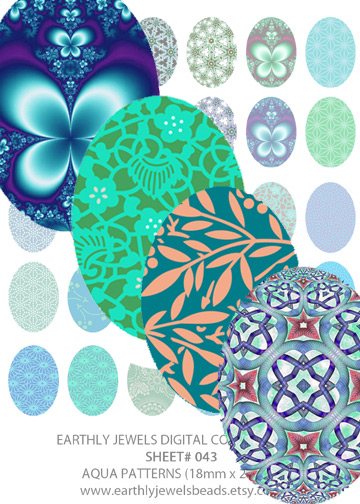
Another collage sheet of pretty patterns in aqua/green-blue colors...reminds me of the ocean during summers...
Here are some samples on brass settings....
And last...a lovely collage sheet of vintage women ...this time by John Godward. It is available in 30x40mm ovals as well as 18x25mm ovals...
And this is what it would look like in a setting...
The vintage Godward Ladies is yet to be posted in my etsy shop but the others are already available!!! This week, I'm hoping to actually make a few resin pendants from these sheets. However, I don't know if i will be able to since I am attending a ceramics class too!!!
I am super excited about it. It only meets for 6 sessions so I'll be done in two weeks.I'm not sure if we will be able to create any pieces that we want or if we are bound to stick to whatever the instructor tells us to make (pottery? vases?) Hopefully, we can deviate from the norms and go with what we feel like making...for me, jewelry pieces!!! Anyway, hopefully i'll get to post pictures of it in the coming days!!!
Well..I hope you had a great Easter weekend! I sure did, lounging around with the hubby and the doggie-baby!!! Now, its back to work!
Labels:
Cabochons,
Cameo,
Charm Necklaces,
Digital Collage Sheets,
Graphic Pendants,
Graphics,
Ovals,
Pendants,
Printables,
Product Updates,
Settings,
Supplies,
Vintage Graphics,
Vintage Women
Monday, March 26, 2012
Domino Pendant with Resin Tutorial Available on Etsy
I've finally completed my tutorial for the domino pendants with resin dome. I've made it available in both my FB shop and on ETSY as a digital file to be sent to your email...here are some photos...
If you're looking to do something different, learn something new...why not give this a try...it's totally addictive!
THE TUTORIAL INCLUDES:
- 20 pages of detailed, step by step instructions on how to make the pendants as well as how to work with the resin
- over 50 colored pictures showing every step.
- detailed list of materials you will need
SKILL LEVEL/ PRE-REQUISITES:
Beginner to Intermediate.
- over 50 colored pictures showing every step.
- detailed list of materials you will need
SKILL LEVEL/ PRE-REQUISITES:
Beginner to Intermediate.
No previous skills with resin is needed to be able to work on this tutorial
These are some of the things you will need for your project...
Here's some of my sample finished products...
If you're looking to do something different, learn something new...why not give this a try...it's totally addictive!
Here is my etsy listing -
Labels:
domino pendants,
Graphic Pendants,
Pendants,
Tutorials
Saturday, March 17, 2012
Custom Bezels
So..here's the newest in my shop...custom bezels....
Most of them will be made to order and you can customize what colors you want. They're handmade from polymer clay with an inset of 18 x 25 inch. Great for graphic pendants or decorating with your own clay creations. Here are some closeups...
Labels:
bead making,
Cabochons,
clay,
custom bezels,
Graphic Pendants,
Graphics,
Ovals,
Pendants,
Picture frame,
Polymer Clay,
Product Updates,
Settings,
Supplies,
Vintage Graphics,
Vintage Women
Thursday, March 15, 2012
Domino Pendant Tutorial Work In Progress
Its my first time to work on a kit and tutorial...and i never knew how much fun it could be. You have to go through a whole project, carefully document each step of the way. You need to keep in mind the steps and always keep thinking if each move you make is a step that needs to be photographed....
I actually finished all the photos and now I'm on to writing down and formatting the tutorial itself...I'm enjoying myself.. Here's a little peek...
As you can see , its gonna have lots and lots of pictures and detailed descriptions to go along!!! I'd say I'm maybe 45% done...hopefully tomorrow it will be 100%... Here are the finished pendants that you end up with at the end of the tutorial...
Of course the designs of the images may vary in the kit. And look still a lot of resin left over (the sampler size resin kit was used for the tutorial) from the pouring....
And of course I offered some suggestions on what you can do with the leftovers....Here's what i did...
I'm soo excited to put it up in the shop. I will be offering it in 3 ifferent ways...1- As part of a whole kit and tutorial 2- as part of a kit and tutorial but with no resin (for those that already have their own resin) and 3- as just the tutorial (for those that want to get the materials themselves, separtely).
Just another day or two, i'll have it in my FB shop. But, I'll be posting it also on my etsy shop for my international customers!!! Can't wait!
Thursday, March 8, 2012
March Color Challenge
MARCH JEWELRY COLOR CHALLENGE
THIS MARCH I AM INVITING ALL MY PAST CUSTOMERS TO JOIN THE MARCH JEWELRY COLOR CHALLENGE.
HOW DOES IT WORK...READ THE MECHANICS BELOW..
FOR THIS CHALLENGE, I WILL PROVIDE TWO INSPIRATIONAL IMAGES. CREATE A PIECE OF JEWELRY INSPIRED BY ONE OF THE PHOTOS PROVIDED USING ANY COMPONENT OR COMPONENTS PURCHASED FROM EARTHLY JEWELS BEADS.. YOU CAN SUBMIT PHOTOS OF AS MANY PIECES OF JEWELRY AS YOU WISH TO ENTER TO THE CHALLENGE. EACH JEWELRY PIECE SUBMITTED WILL BE COUNTED AS ONE ENTRY.
COLOR INSPIRATION PHOTOS ARE FOUND IN THE BOTTOM OF THE PAGE...
CONTEST RULES:
1 –YOU MUST USE AT LEAST ONE COMPONENT PURCHASED FROM EARTHLY JEWELS BEADS IN YOUR JEWELRY PIECE. (WHETHER IT IS RING FINDINGS, SETTINGS, BEADS, A CLASP, OR EVEN JUST EYE PINS) YOU MAY THEN INCORPORATE OTHER BEADS, CLAYS, AND FINDINGS TO YOUR PIECE AS WELL TO COMPLETE YOUR PIECE.
ENTRIES THAT DOES NOT USE A COMPONENT PURCHASED FROM EARTHLY JEWELS BEADS WILL BE INVALID AND WILL NOT BE QUALIFIED TO WIN.
2. SUBMIT ENTRY VIA PM ON FACEBOOK BY PROVIDING
(1)A LINK TO THE PICTURE OF YOUR CREATION
(2) THE NAME OF THE COMPONENT YOU USED IN YOUR PIECE (THAT WAS PURCHASED FROM MY SHOP)
(3) THE PHOTO YOU CHOSE TO USE FOR YOUR INSPIRATION
(2) THE NAME OF THE COMPONENT YOU USED IN YOUR PIECE (THAT WAS PURCHASED FROM MY SHOP)
(3) THE PHOTO YOU CHOSE TO USE FOR YOUR INSPIRATION
EXAMPLE –
http://www.facebook.com/photo.php?fbid=10150514812733009&set=a.10150514812543009.469653.571528008&type=3&theater
BEADS
VAN GOGH PAINTING - IRISES
BEADS
VAN GOGH PAINTING - IRISES
3. YOU MAY SUBMIT MORE THAN ONE PICTURE FOR AN ENTRY. I WILL, HOWEVER, COLLAGE THE PICTURES THAT YOU PROVIDED AND COME UP WITH A SINGLE PHOTO TO POST ON THE CONTEST ALBUM. YOU MAY ALSO SUBMIT A PHOTO COLLAGE AS YOUR ENTRY.
YOU CAN ALSO SUBMIT YOUR PHOTO BY SENDING THE PICTURE TO ME VIA EMAIL – myearthlyjewels@yahoo.com (PLEASE PROVIDE YOUR NAME IF SUBMITTING VIA EMAIL)
4. YOUR ENTRY MUST BE A NEW CREATION MADE AFTER MARCH 8. YOU MAY NOT SUBMT A PIECE THAT YOU HAVE ALREADY CREATED PREVIOUSLY.
5. YOU MAY USE ANY MATERIAL FOR YOUR JEWELRY PIECE SUCH AS POLYMER CLAY, BEADS, WIRE, RESIN OR A MIX OF DIFFERENT MATERIALS... ETC.
6. YOUR ENTRY CAN BE ANY PIECE OF JEWELRY FROM EARRINGS, NECKLACE, PENDANT, BRACELET RINGS ETC AS LONG AS YOU HAVE CREATED IT YOURSELF.
7. YOUR CREATIONS MUST TAKE INSPIRATION FROM ONE OF THE PHOTOS PROVIDED. THE COLOR PALETTE PROVIDED BELOW THE INSPIRATION IMAGE IS ONLY A SUGGESTION. YOU MAY USE OTHER COLORS FROM THE IMAGE AS WELL.
8. CUSTOMERS PURCHASING AFTER THE START DATE OF THE CHALLENGE MAY STILL ENTER THE CONTEST AS LONG AS THEY SUBMIT THEIR PHOTO ENTRIES WITHIN THE CONTEST PERIOD.
CONTEST PERIOD – MARCH 8 UNTIL MARCH 31
CONTEST BEGINS MARCH 8. PHOTO ENTRIES WILL BE ACCEPTED STARTING TODAY UNTIL MARCH 31. THE PHOTOS WILL BE CONTINUOSLY UPLOADED TO MARCH COLOR CHALLENGE ALBUM ON THE SAME DAY IT IS SUBMITTED.
SHARE YOUR PHOTOS ON THE ALBUM WITH YOUR FRIENDS...AND GET AS MANY LIKES FOR YOUR ENTRY AS POSSIBLE. LIKES COUNTED IN THE CONTEST MUST BE FROM THE PICTURES OF THE MARCH COLOR CHALLENGE ONLY.
WINNERS WILL BE ANNOUNCED ON APRIL 1ST!
PRIZE
THE FIRST AND SECOND WINNERS WILL WIN
A ONE SHOT, SAMPLER SIZE RESIN KIT
HOW TO WIN
THERE ARE THREE WAYS TO WIN IN THE MARCH COLOR CHALLENGE.
FIRST WINNER -
THE PHOTO WITH THE MOST NUMBER OF LIKES WILL WIN A ONE-SHOT SAMPLE SIZE RESIN KIT.
YOU MAY SHARE YOUR PHOTOS ON YOUR WALLS AND ASK YOUR FRIENDS TO LIKE. THEY CAN ALSO LIKE AS MANY ENTRIES AS THEY WANT.
IN CASE, THE HIGHEST NUMBER OF LIKES IS TIED BETWEEN TWO OR MORE, THE FINAL WINNER WILL BE SELECTED RANDOMLY AMONGST THE TIED ENTRIES.
FIRST WINNER WILL BE ANNOUNCED/SELECTED ON APRIL 1ST.
SECOND WINNER
ANOTHER WINNER OF THE ONE SHOT SAMPLE SIZE RESIN KIT WILL BE RANDOMLY SELECTED USING THE RANDOM NUMBER GENERATOR ON RANDOM.ORG AMONGST ALL THE VALID PHOTO ENTRIES SUBMITTED.
SECOND WINNER WILL BE ANNOUNCED/SELECTED ON APRIL 1ST.
THIRD WINNER
THE THIRD WINNER WILL BE TAKEN FROM THOSE THAT HAVE “LIKED” AN ENTRY. I WILL LIST DOWN ALL NAMES OF THOSE THAT HAVE LIKED ANY ENTRY FROM THE MARCH COLOR CHALLENGE ALBUM AND RANDOMLY CHOOSE A WINNER USING A RANDOM NUMBER GENERATOR. EACH NAME IS EQUAL TO ONE ENTRY DESPITE THE NUMBER OF TIMES YOU LIKED SEPARATE PHOTOS.
THE THIRD WINNER GETS A “FREE SHIPPING” COUPON FROM EARTHLY JEWELS BEADS.
THOSE THAT HAVE ENTERED THE CONTEST MAY ALSO LIKE THEIR OWN PHOTOS AS
WELL AS OTHER PHOTOS. YOUR NAMES WILL ALSO BE INCLUDED FOR THIS 3RD DRAWING.
NOTE - LOCAL RESIDENTS ONLY TO WIN IN THIS 3RD CATEGORY.
THE THIRD WINNER WILL BE ANNOUNCED/SELECTED ON APRIL 1ST.
INSPIRATION PHOTOS
USE ANY OF THESE 2 PHOTOS TO CREATE A PIECE OF JEWELRY
VAN GOGH PAINTING – IRISES
OR SECOND INSPIRATIONAL PICTURE -
CLAUDE MONET'S - VENICE TWILLIGHT
Sunday, March 4, 2012
What can I do with Resin
I noticed a lot of people asking about resin and what it can be used for...and its amazing at the many possibilities you can do with it...
First, I've used resin before as a top coating, to give a piece a domed, glassy, magnified look...especially in domino pendants such as these....
also same thing with scrabble tile pendants...like these...
You create a domed effect when you use the resin on a flat surface. You can also use resin to fill a bezel. For example, you can use it in traditional type bezels such as these settings which are made from polymer clay...
or in metal settings such as these...
Other bezels you can use are bottlecaps, buttons, shells, spoons or any other thing that has a "cup" like area that the resin won't seep through...you just need your imagination to come up with more...
You can use certain molds like the flexible silicone molds or special plastic molds to create beads or other castings...I used a special plastic molds to create these basic shaped cabochons...
In these cabochons, I incorporated glitter/ pearlex powders. That's another nice thing about resin...you can incorporate anything you want...from candy, rhinestones, pictures, charms, glitter and so much more to create a collage like effect...
Look at these really cute resin bangle with embedded candy sprinkles sold by Lunaricsales on Etsy ...
This is a picture by India from her shop Lunaricsales...check out her shop..she has lots more beautiful resin jewelry there...
If you work a lot with polymer clay...you can use resin in a lot of techniques... check out Eugena Topina's Tutorials on resin and polymer clay!
She has tutorials on creating faux lampwork with polymer clay...which I bought a couple months back...but haven't had time to try it yet....but I'm sure itching to do so!!!
She also has tutorials with resin to create Faux Cloissone, Faux art glass, faux enamel, resin and gold leaf. Check out her page on Polymer Clay Tutorials!!! They're all so lovely...
So, that's just a few ideas of what you can do out of resin.... your imagination's the limit!!!
Subscribe to:
Posts (Atom)