Rainy, cold weather seems to make me very creative...I started out watching this youtube video (click here) and wanted to give it a try.

Although it didn't come out like the cane in the video, I still loved how it came out...Here are a series of pictures that takes you through a step by step on how to make the cane...
I took 3 colors...white, pink, and violet and from those made to sheets using the skinner blend technique...

Fold up sheets like below making widths of both sheets similar...

Run each sheet through your pasta machine (i ran it through the thickest setting)..

Roll up the long strips starting with the white end...

You end up with these 2 fat logs. I sort of squeeze them together so that the ends are smooth like the log on the right side...

Cut the logs in half and further into 8 pieces each...


Separate pieces...

and insert alternating pieces as follows...

slowly start to squeeze the block of clay...

Squeeze the bottom part more to start to form a petal shape...

I cut the cane in half to see what it looks like...starting to look nice...

I shape it more like a petal by smooshing the ends together... I like to keep half of the cane the way it is (large) to use as petals for bigger flowers... the other half is reduced further...

I reduced the cane further and covered it with a fuscia colored sheet... cut it into 6 pieces and start to assemble into a flower...

Make a round cane for the center...

Start to fill in the space between the petals...yellow...

violet...
pink...

Reduce by squeezing..I squeezed from the center but it looks like its distorting...
oh no..is it a failure...

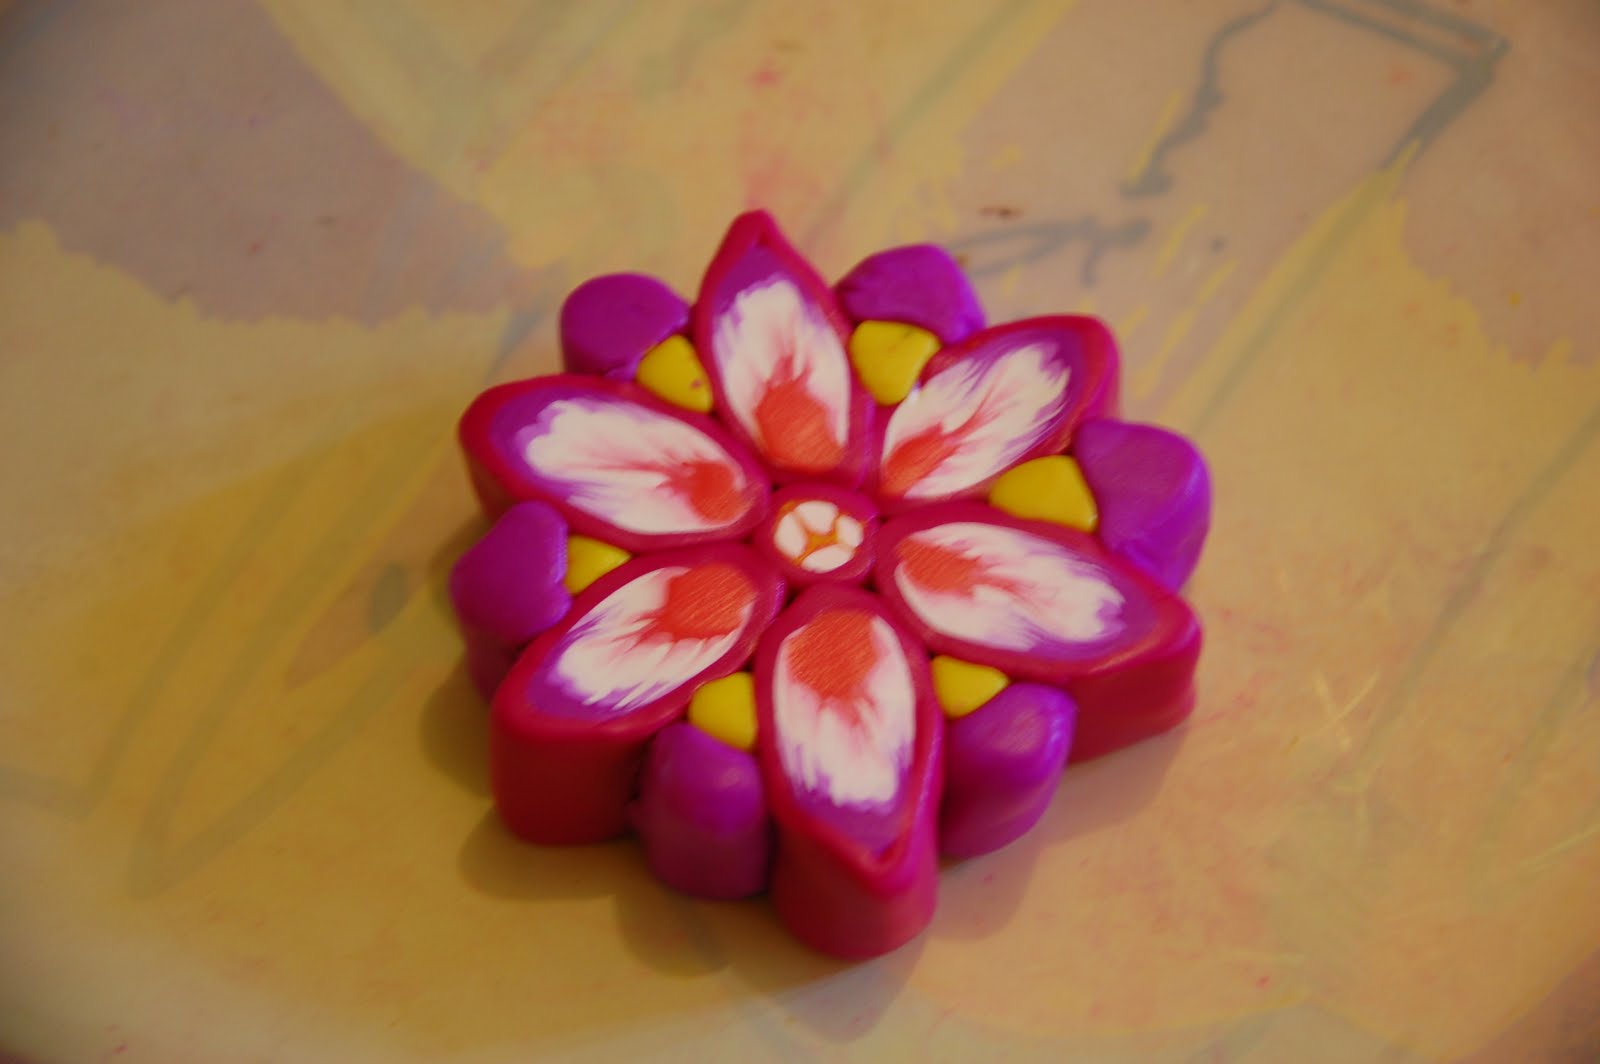
I cut it in half and see a pretty flower....success! I take half and put that away...
The other half I reduce further and cover around with another sheet of fuscia...

Ta-da...the whole lot...Even the scrap clay look nice....

Hope you enjoyed the step by step. Hope you can make your own from the pictures...
That's all for now..have a great day!

Beautiful work! Thanks!
ReplyDeleteOh wow that turned out awesome! I love seeing the step by step!
ReplyDelete