Wednesday, March 30, 2011

March ABS Challenge

I'm entering the Art Bead Scene Challenge for the first time this month of March. This month's inspiration is Paul Gaugin's Painting Nave Nave Moe (Sacred Spring, Sweet Dreams)


Here's the piece I created....named after the artwork...
Sacred Spring


(Sorry for all the photos...I just couldn't pick 1 or 2 because they all came out so nice).

The art bead focal was created by Me (*yehey*). It is made of polymer clay, painted with acrylics and watercolor and finally sealed to give a light shine.

I had fun with this challenge...my first at Art Bead Scene Challenge! 
You can check out the other entries at the flickr site here

Thanks for a great challenge ABS!

BTW...Working on ABS Challenge


I've got a couple things going on the work table today..multi-tasking....

On the right side, I am finishing up with the beads I made last week....adding Future to seal and give it a good shine....


And on the left, I'm putting together my piece for the ABS challenge. I finally get to enter this month since I have created my very own art bead from polymer clay as seen in the lower left. I made it just in time...I only have until tomorrow to enter...so now...I need to get back to the table....

That's all for now...have a Happy Wednesday!

Monday, March 28, 2011

Shop Updates and Ofcourse More Beads

I've been working hard to make up for my big bead fail last week so, I've spent most of my time creating new beads. Over the weekend, I got a new little oven and was able to make these beauties which are waiting for me to be painted....

Some closeup pics...focals and cabochons....

I'll be working on them tonight and tomorrow. I ran out of clay to work with though, so I definitely need to get some more (*wink*) to feed my obsession....

The bad part about this new bead making obsession is that I've been sort of neglecting my Etsy shop...I decided I needed to pay it a bit more attention so, I photographed my newest charm pendants today so, I can start uploading to my shop on daily basis again.... Here they are on my work table waiting to be photographed....


Lots of pretties there...a few owls, some romantic hearts, butterflies and even some steampunk style pendants.... Now all I need to do is do a bit of editing (cropping and brightening up the pictures) and they're ready to be listed on Etsy... no more neglecting the shop :-)

Now...I can get back to bead making!!!! Yey!

That's all for now....Have a great day!

Thursday, March 24, 2011

Bead Fail

I've been doing so well with my bead making when yesterday, I had the biggest bead fail. I was almost done with the first and second batch of my beads...initial baking, then decorating and painting and finally I added the sealer... I used a polyurethane floor wood varnish as I couldn't find Varathane in the 2 shops that I visited. They had a sample piece of wood at the store and it really was a beautiful finish. So, I decided to give it a try. The varnish is called Pye Wood Varnish. It is a resin based air drying polyurethane as described in the website.

I painted it on lightly and it gave it a nice shine and seemed to work pretty well with the clay. I figured it probably works the same as the Varathane. So, I proceeded to paint one side (the top side) of the rest of the finished beads.  I decided then to try to bake it again in the oven since I read the re-baking items that were sealed with the finish helps too. So, I turned on the oven at 130C and set the timer for 10 mins and left it to bake. About a little more than midway through, I started to smell a horrible scent and went to go to the kitchen, turned off the oven and took out the beads...and when I opened the foil covered baking pan, my heart sunk to find my beads were horribly burnt, distorted and smelled disgusting... take a look what happened to my beautiful beads....

Boohoooo...I don't even want to say what some of them look like but, you can see them for yourself.


I think I may have had the heat too high and had it in for too long. The oven I was using does not have an even temperature all throughout so some parts may have even been hotter. Some parts were ok and some beads were actually saved. The heart had a pretty shiny and hard cover (and would have been beautiful i think) .... here' a closeup...

unfortunately the bottom and back parts were deformed....

Well, I was able to save a few beads, although, they do have some slight imperfections....

The top right bead is deformed but still kind of looks pretty cool... My 3 favorite beads were saved...the one in the center and the 2 beads to the right and lower right.. they turned out really pretty and I'm so glad they were saved. (The one on the lower right is slightly sticky though, perhaps not fully dry yet.)

So...that's my big bead fail. But, it's alright...I know you have to go through some wrongs to be able to learn what's best. What I learned....always do a test batch before using your actual beads. Second, check on what your doing. I left the beads for 10 minutes but since I was testing it, I could have gone and checked on it every couple of minutes just to make sure things are going ok. And third, make sure to read and learn everything you can before starting a trial run. I was reading around after and I read that you have to bake the sealed beads at only 200F or 93C...I used 130C...

So, live and learn....

Well, to battle the bad things that happened...here's 3 good things going on...First, take a look at the texture sheets I made that were quite successful...

The one on the left was taken from my nephew's stone box that he got from Vietnam. The box entire is beautifully carved from stone and I just took a section from it. I'd love to make a mold from the entire cover but I didn't have enough clay for it. I'll just have to go back again one time...

Second, look at these wonderful dental tools my niece generously gave to me. They are old tools from back in her dental school days that she can no longer use in dentistry...(mostly slight rusting and grime)...but are awesome tools for clay and bead making...YEY!!!

So many!!! Here are just a few of the tips (double sided too!)


Not only that, look at the handles of the tools...they're great for different textures too! Who would have known that I would love dental tools (*winks*)

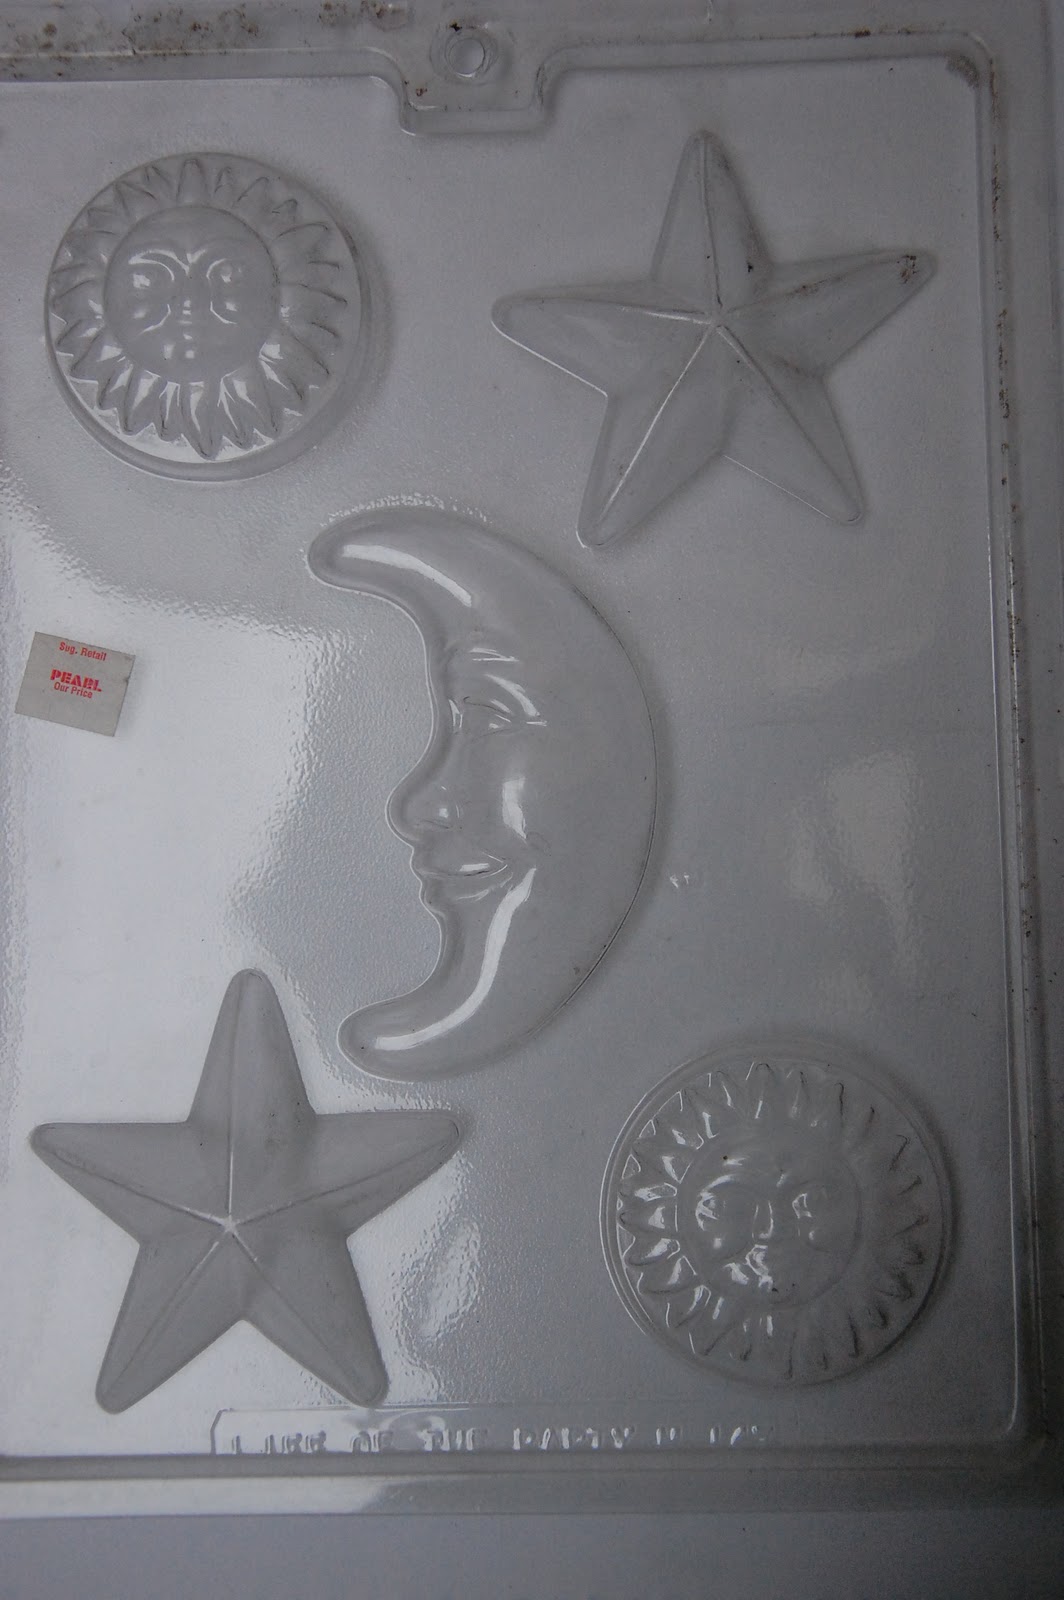
And third...I found my old candy molds which were never being used...now, they will be specifically for clay...(they need a lot of cleaning though since they've been stashed away for quite a long time)...


Three good things...one bad...not too shabby!

That's all for now....Have a great day!


Tuesday, March 22, 2011

Goodies in the Mail and Painted Beads


Look at what came in the mail today!  It's the wonderful prize I won from Gem Trails...


Yey! Look-sie at all the goodies. I already used one of the metal components (the one that looks like a daisy) as a stamp in making one of the beads that I am working on. (You can see it in the tray of beads below.) I plan on setting the cabochons in clay also. I'm so excited to play with these. Thanks so much Deci! I love the prize so much! 

Here's what I was working on today... first, I packed up a sale and scheduled a pick up from the courier for tomorrow. 

Second, I made a batch of beads (polymer) ...setting up even sized balls to be made into focals...

Here they are all stamped up and colored with pearl-ex and I also tried using eyeshadow to color them. I've only filled up half of the tray so, I need to keep making more to fill it up and have a full batch before I bake them. 

And lastly, I tried out painting the beads I had worked on over the weekend. (These ones are already baked)
I really love how they turned out...very rustice, antique looking and some even look like raku. The picture does not do them justice. I really need to learn to take better pictures of them for the online shop. I don't really know how to take pictures of beads or how to have product shots for them. (Note to self - research on bead product shots) I plan on putting these up for sale real soon. I still have one more step to do on them...sealing. I really wanted to finish them today, However, I don't have any available here at home. I'll be going to the hard ware store to check out some of the sealers I've read about online.

I really don't know how to price these beauties. I did a lot of work on each of them. Decorating them, stamping them, baking, painting, sealing.... the painting especially takes some time because I individually hand paint each one. Hm....any ideas would be welcome!

What I do know...I am totally addicted to bead making!!!!!

That's all for now....Have a great day!


Monday, March 21, 2011

Bead Making Success...and Meet Kobe too!


I want you guys to meet Kobe..my niece's West Highland Terrier (Westie). He's staying with us for a few days while his mommy is on vacation in Bangkok. He's a really sweet and lively puppy. He loves people and hates being left alone.  I had to run a few errands this morning and when I left, I can hear him bark his high pitch sad little bark asking me why am I leaving him. So, before I went back home, I made sure to bring him a treat as a peace offering.

Here he is now...happily chewing away a milk bone treat....

(Kobe - "how could you leaave me all alone...")

(Kobe - "i forgive you..but don't do it again!")

He was sniffing around in my bag where I still secretly have a toy for him and another bag of treat sticks...for later.

On too crafty stuff....

I was able to play around with the clay I bought. Boy, that Kato was really hard to condition. It refused to soften even with the pasta machine. I had to rub my hands with baby oil and take little pieces of the clay and pressed it with my hands. Eventually, it did soften.

The Sculpey Studio clay was much easier to condition. And it didn't take me long before I had the whole package conditioned. 

Here's the beads I came up with so far...


These ones I started painting already...

I liked how they turned out! I'm still figuring out the best painting methods. I'm ready to make some more!  Although, I think I can list some as undecorated, unpainted so, that people that want to purchase them can add their own creativity to the bead itself. Oh how I'm loving clay! So many great things you can do with it!

That's all for now...have a great day!